Did you know I wrote an Instant Pot cookbook? After developing over 150 Instant Pot recipes, that appliance and I may ride off into the sunset together. I know it inside and out, and I know how to get tender, juicy Corned Beef cooked in a fraction of the time it takes a slow cooker.
When I’m creating recipes I try to tailor them to be easy for a beginner cook, but also give you options for you to flex your culinary muscles. For this recipe, I gave you a few options depending on your skill level and time availability.
Want to brine it yourself? Great! I’ve got instructions for that! Have a pre-brined beef? Also great!
Don’t have an Instant pot? I included slow cooker instructions.
Want to try sous vide? I’ve got you there, too.
Homemade Corned Beef Instant Pot Recipe
If you’re a from-scratch nerd like me, you’ll love brining your own corned beef for St. Patrick’s Day! Just a handful of whole spices is all you need and I’ll walk you through it all – where to find things and the entire process from start to finish.
I’m giving you a couple different options for cooking, too – Instant Pot and sous vide. Both are easy and produce some amazing corned beef!
Why Should I Brine a Corned Beef Myself?
In Natalie-fashion, I wanted to create a corned beef recipe totally from scratch. Why? A couple of reasons....
- Most. No, ALL of the corned beef kits (whether or not they're pre-brined) I see in the store use factory-farmed beef. I have never seen a pre-brined grass-fed corned beef. SO, for that reason alone, I search out a grass-fed brisket.
- I can control the ingredients (specifically the type and amount of sugar) in my brine. And in the seasoning.
- Plus, I have this awesome sense of accomplishment when I make something 100% from scratch. (I don't have any desire to be a cattle rancher, so this is as far as I'll go.)
Natalie-fashion is usually control freak fashion. If you've been around here for a while that shouldn't surprise you.
Instant Pot Corned Beef Recipe Ingredients
- Kosher salt
- Coconut sugar
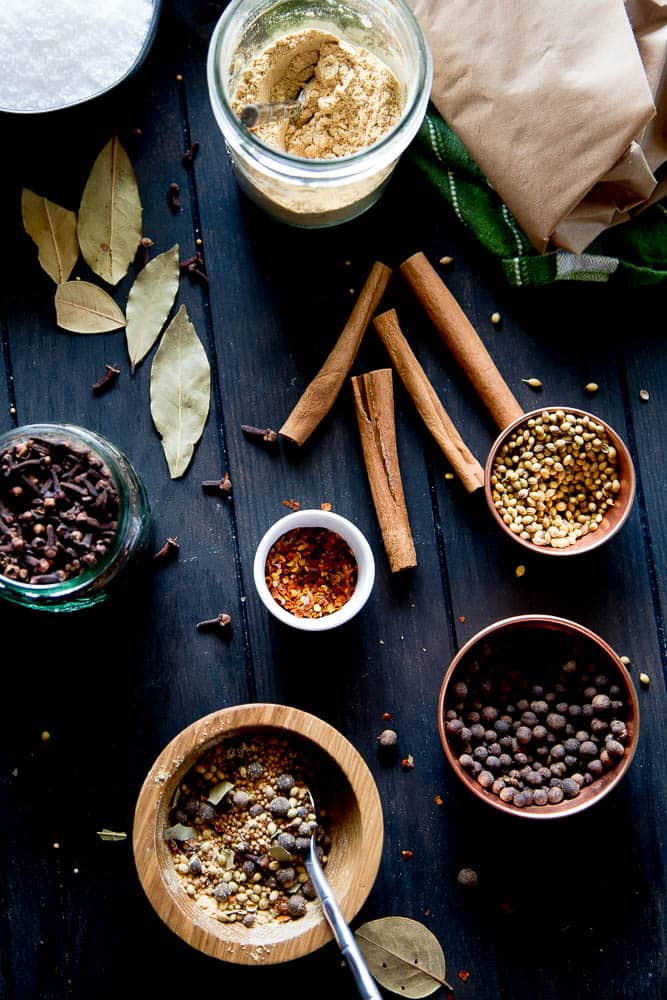
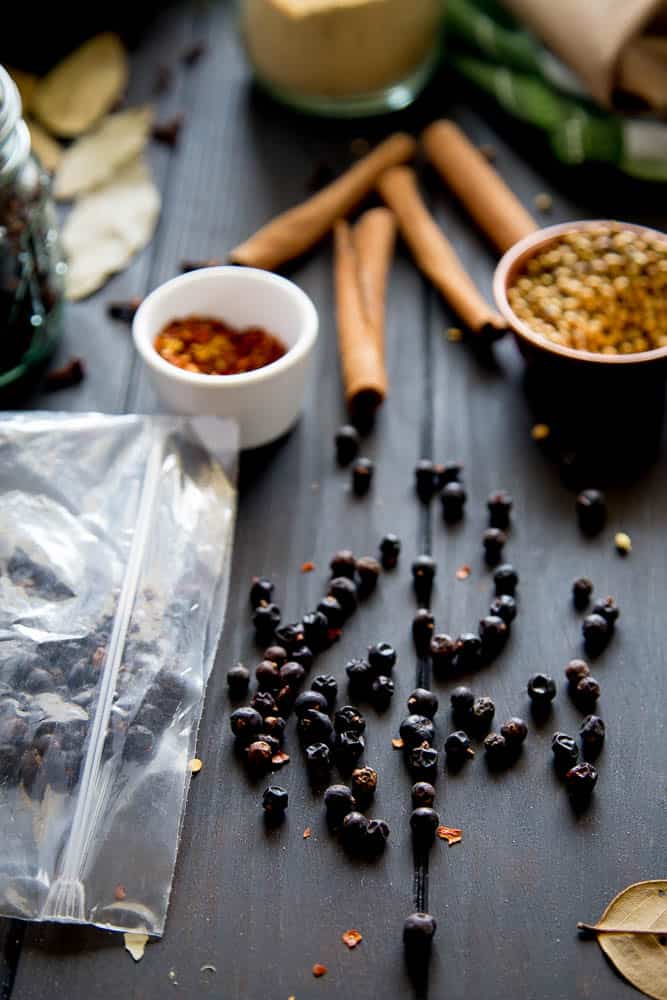
- Pickling spices, divided
- Juniper berries, divided
- Cinnamon sticks, divided
- Ice cubes (about 6 cups)
- Beef brisket (grass-fed, if possible)
- Onion, cut into wedges
- Garlic, smashed
- Beef broth
- Carrots, cut into ½-inch pieces
- Cabbage, cut into wedges or large pieces
- Baby potatoes or other white potatoes cut into 1 ½ - 2 in pieces
- Whole-grain mustard, for serving
How to Brine Corned Beef
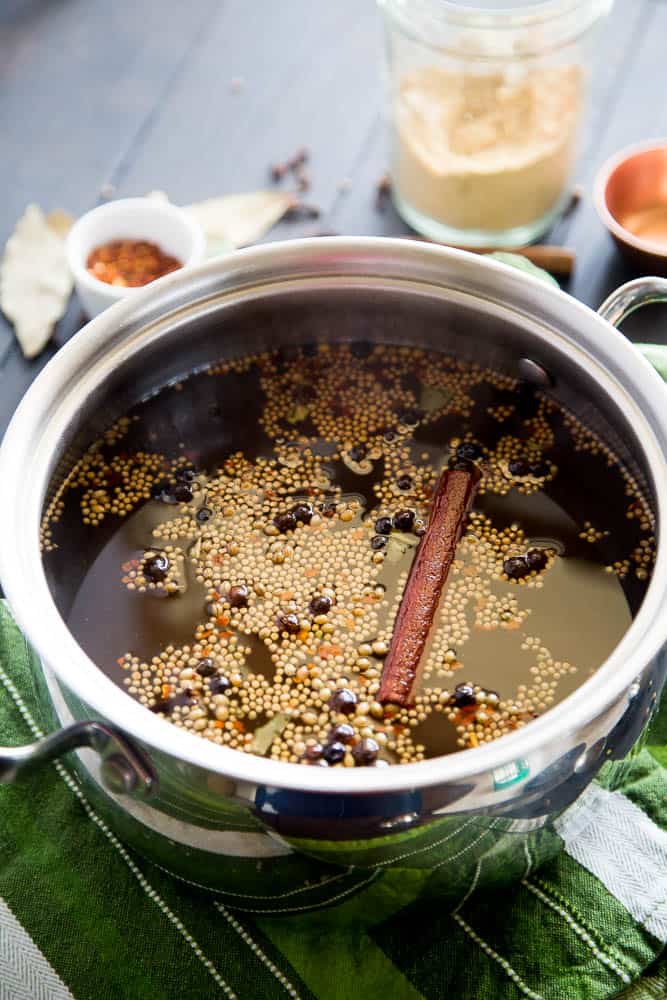
- Put 2 quarts of water in a large pot over high heat. Add the salt, coconut sugar, half of the pickling spices, half of the juniper berries, and 1 cinnamon stick to the pot. (Reserve the remaining spices for when you're ready to cook the brisket.)
- Let the brine simmer until the sugar is dissolved and then remove it form the heat. dd the ice to the pot to cool the brine quickly. Refrigerate the brine until it is at least 45°F (7°C) or colder. This might take a few hours.
- When the brine is ready, cut the brisket in half and put it and the cooled brine in a very large pot or container that will be used to hold the submerged brisket (and fit in your fridge) for several days. Add a little water, if needed, to cover the brisket entirely. I found my 6-quart pressure cooker insert pot worked well for this. Chill for at least 5 days and up to 10 days. If it floats to the top, put a sealed aluminum can (like a can of tomatoes) or a glass jar on top of it.
How Long Do You Brine Corned Beef?
Making the brine is super easy, but you've got to let it cool before you add the brisket, so that takes several hours.
The brisket needs at least 5 days to brine -- up to 10 days. After brining you can either cook it in your Instant Pot or by sous vide.
NOTE:
If you're making an Instant Pot corned beef, you can skip to the recipe card and follow the directions.
If you'd like to see how to do a sous vide corned beef, stick around because I've got lots of photos to show you...
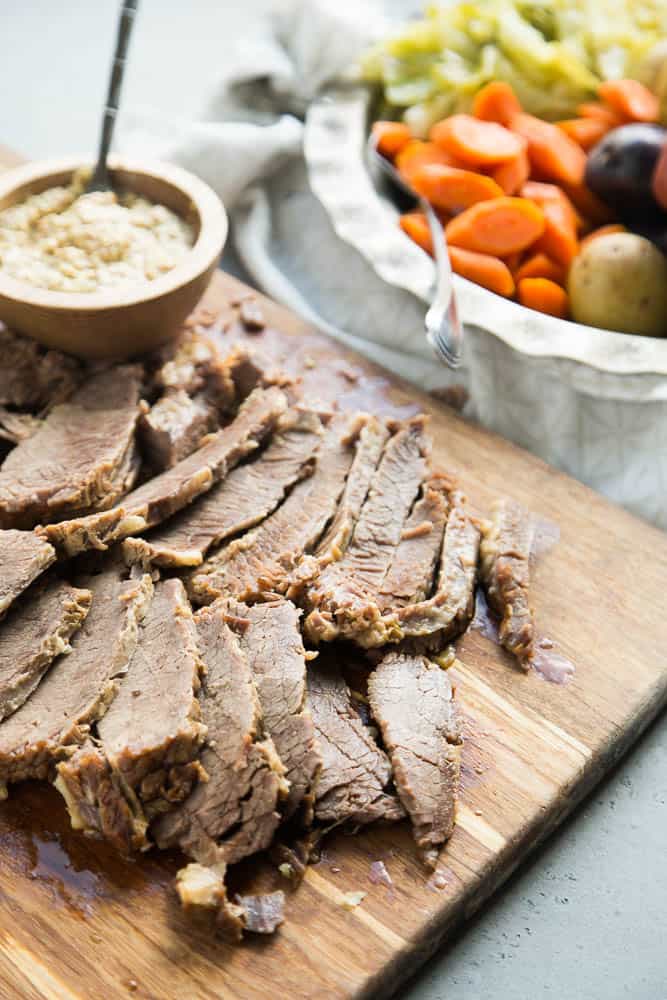
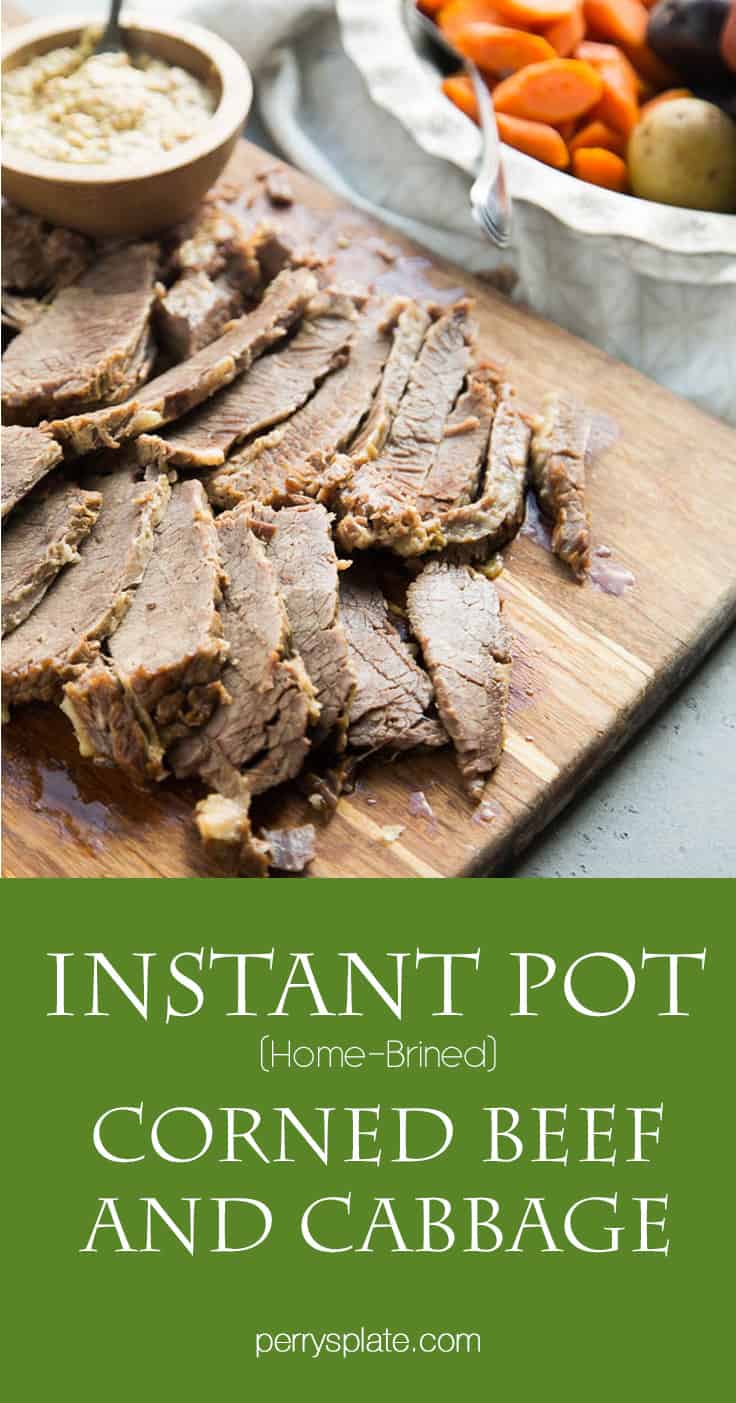
How to Make Corned Beef and Cabbage in Instant Pot
- When you're ready to cook the brisket after the brining process, prepare your pressure cooker by putting the rack in the bottom. Pull the brisket pieces out of the brine, rinse them off, and put them on a wire rack, laying flat. It's okay to stack them. Add the onion wedges and garlic on top of the beef and pour the beef broth over everything. Add the remaining pickling spices, juniper berries, and cinnamon stick.
- Close the lid and the steam valve and set the cooker to high pressure for 90 minutes. Let the cooker release pressure naturally for 10 minutes before releasing the rest of the pressure manually. Transfer the beef to a serving plate and cover to keep it warm.
- Use a slotted spoon or a spider skimmer to remove the onion, garlic, and large spices from the pot. Add the carrots, cabbage, and potatoes to the pot. Close the lid and the steam valve and set the cooker to high pressure for 4 minutes. Do a quick release when the vegetables are finished cooking.
- Transfer the vegetables to the platter with the corned beef, discarding the cooking liquid.
What Do I Need to Cook Sous Vide?
So in the way of equipment, you'll need...
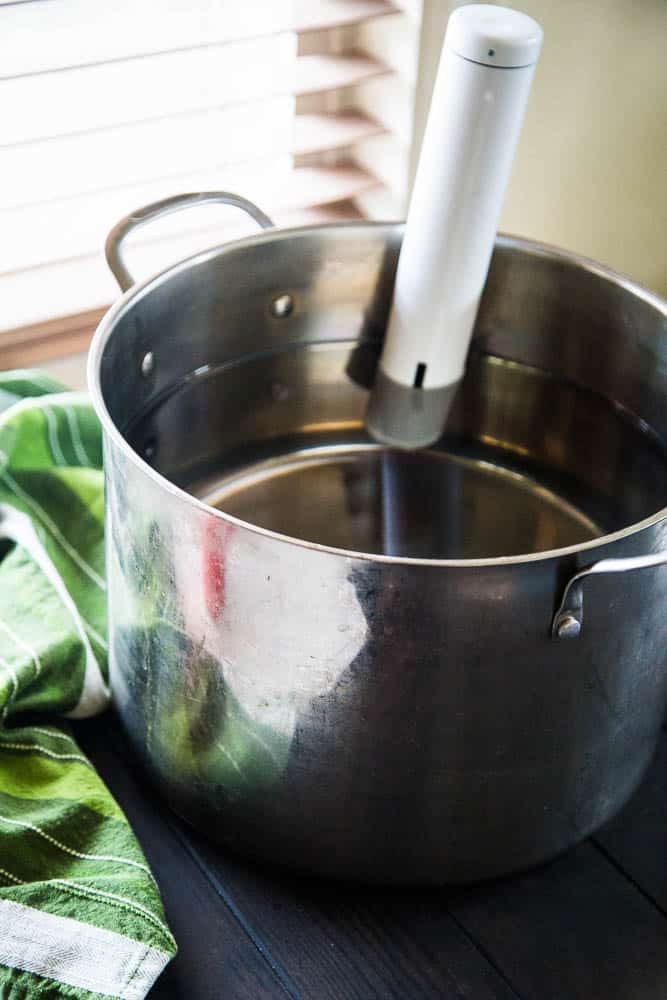
- A pot big enough to hold whatever you're cooking submerged in water -- enough water to move around it. You don't want it too tight in there. I used my big stock pot because I was doing a brisket.
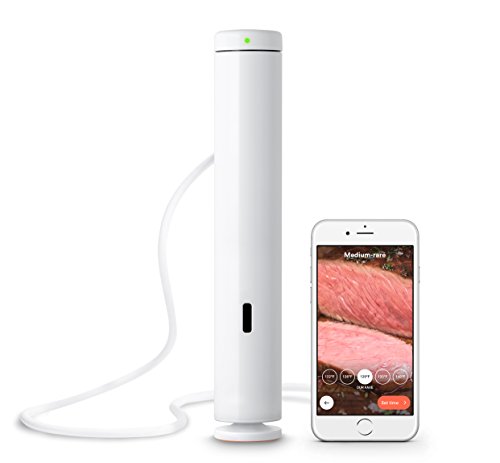
- A sous vide circulator. I LOVE my Joule one. A lot. And it's about the size of an immersion blender so it doesn't take up too much space. It'll fit in a drawer.
- Zip top bags or sealable bags designed to vacuum-pack foods. I have a little kit with sturdy, reusable bags and some clips to keep the bags from floating around. I've also used regular zip top bags. You don't need anything fancy, seriously.
Side Note: If the thought of cooking something in a plastic bag freaks you out -- rest assured it's OK. The water never reaches boiling temperature (not even close, really). And Ziplock brand bags and high quality reusable sous vide bags are BPA free.

What I love about the Joule (ChefSteps) app is that you don't really need a recipe. There are a lot on the app itself. Or if you already have a recipe, you can just use the cooking times it suggests.
Since I already had a corned beef recipe, I just used the timing suggestions on the app.
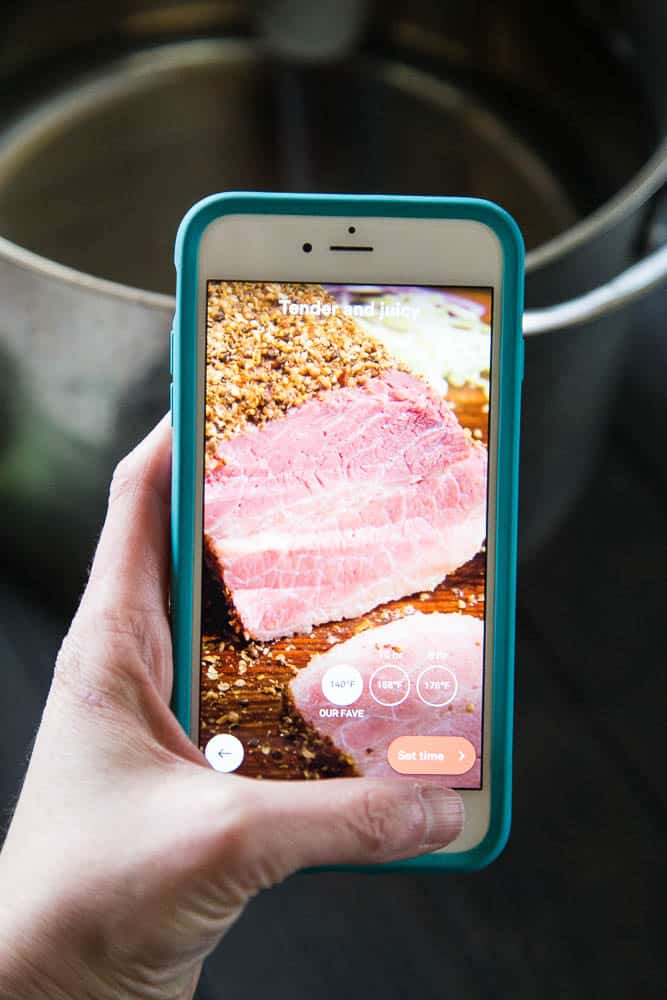
It lets you choose the doneness you prefer and calculates the water temperature and cooking time for you. (I mentioned this was easy, right?)
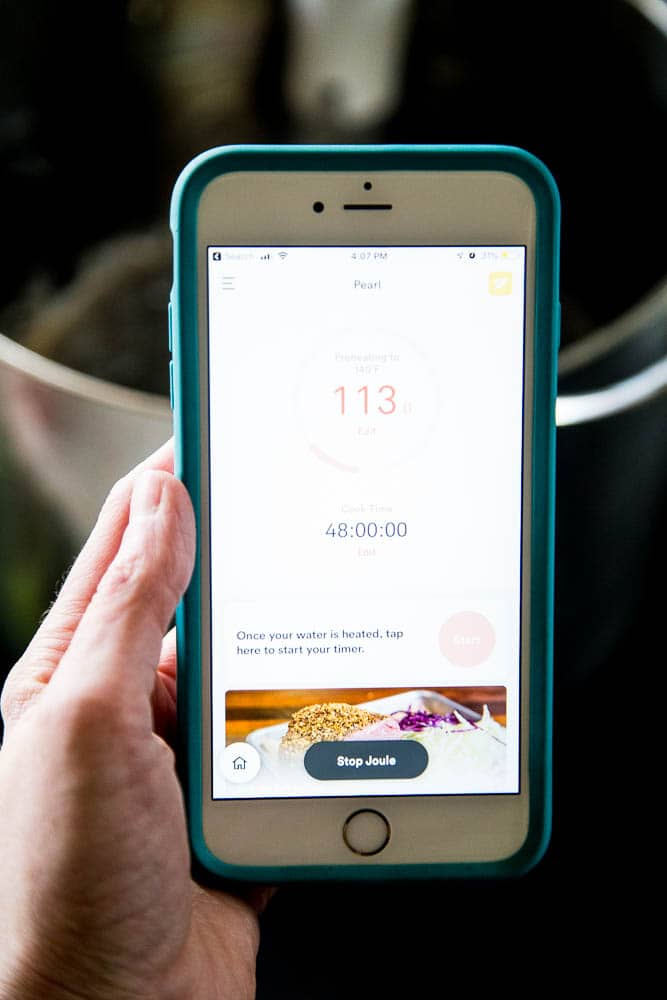
Then you start it! On the app it shows you the temperature of the water and the cooking time left. You can control it where ever you are.
Once I was at my daughter's self-defense class and checked on it. I can stop it remotely, too.
Once it starts, it'll start circulating and heating the water. And it'll tell you when the water is hot enough to add the bags of food.
So, so smart, this thing.
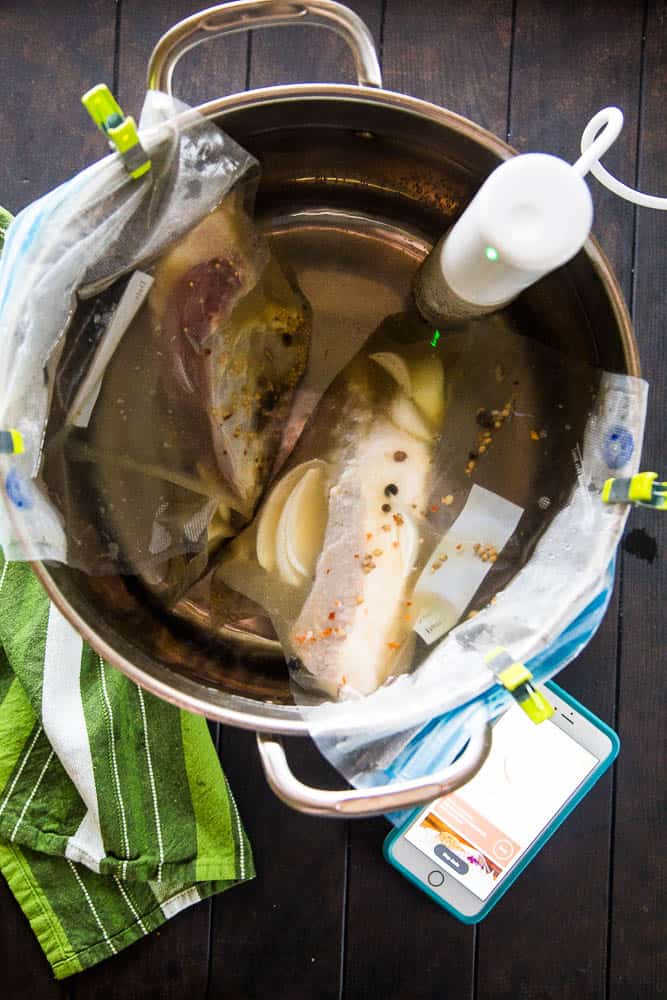
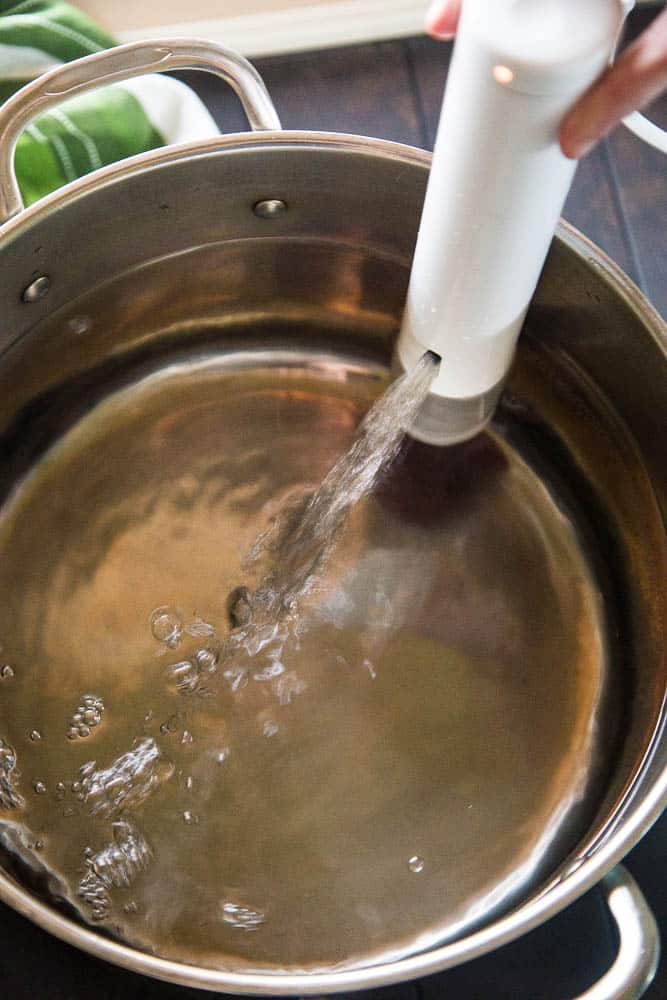
Then you add the food to the bags (I had to cut the brisket in half so it would fit in two bags) along with whatever ingredients the recipe says. (In this case, do this on step 4, when it tells you to put the brisket in the Instant Pot.)
You'll want to submerge it enough so there isn't any air in the bags. It'll form a vacuum itself.
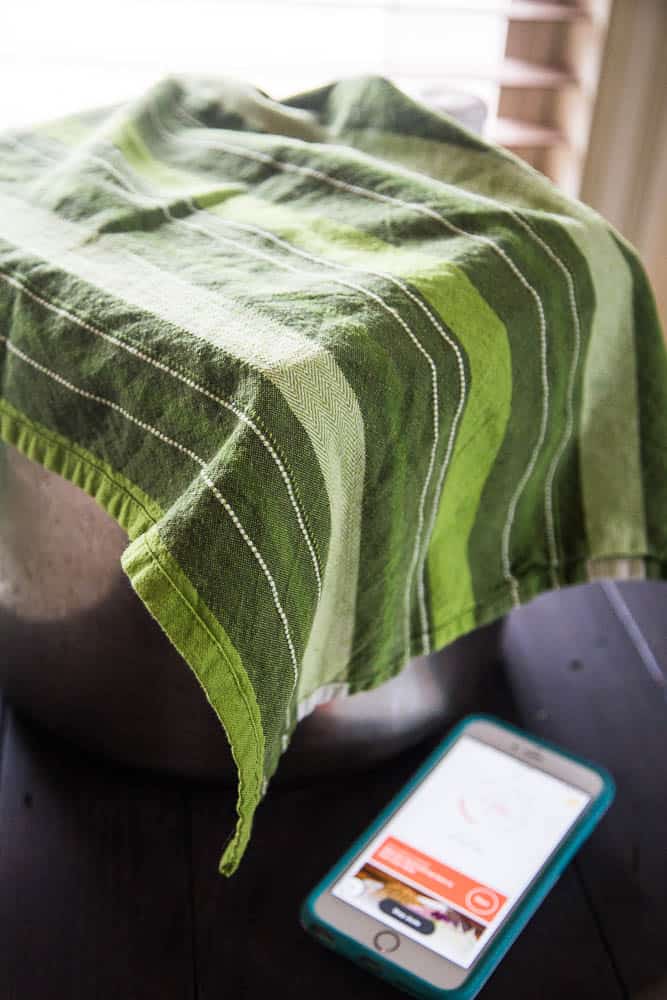
One other thing... you'll want to cover the pot as best as you can so it holds the heat in and cooks more efficiently. I've been meaning to buy a silicone lid that will fit my circulator, but I haven't yet.
Because my pot is so big, I used a small baking sheet covered with a kitchen towel. We fancy.
And now we wait -- 48 hours. Believe me it's worth it. When the cooking time was up, I got a notification on my phone telling me it was ready and that it would hold it at that temperature for another 5 hours if I wanted. (Um, amazing, right?)
How Long Does a Brisket Cook Sous Vide?
OK, I'm going to be straight with you. Sous vide is easy, but it does take a while. It's like an extended version of slow cooking in some cases -- especially large, tough cuts of meat like brisket.
THIS RECIPE TAKES 48 HOURS TO COOK. Yes, cook. As in, I left the sous vide circulator in this pot for 48 hours. In my living room (because I didn't want it sit on the kitchen counter and be in my way).
Speaking of immersion circulators.... that's what cooking sous vide means. You put the food in a bag and push the air out, so it cooks in a little vacuum of its own juices submerged in water that is tightly temperature-controlled.
It sounds complicated, but it's actually really easy to do. Especially if you have a bluetooth enabled circulator with an app on your phone. I'll show you what I mean in a minute.
By the way, this post is not affiliated with Joule in any way. Not sponsored. I love this thing to pieces and wanted to share.
Is Sous Vide Corned Beef Better than Instant Pot Corned Beef?
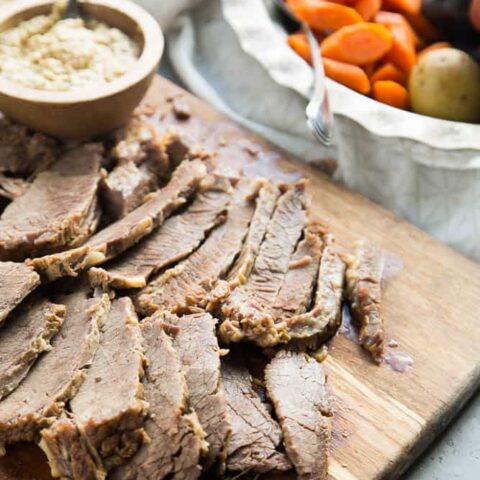
The Instant Pot version of this corned beef is pretty fabulous, but the sous vide version is better, in my opinion.
The meat was more tender and flavorful and my kids wolfed it.
Seriously. I had barely enough to whip up a leftover hash.
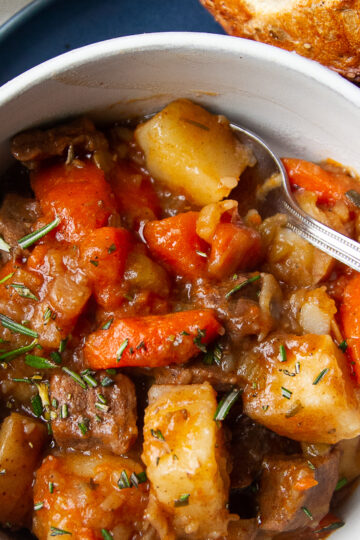
They were so hungry that night and ate it so fast, I didn't take photos of the sous vide version. It looks a lot like the Instant Pot corned beef, so.... here it is again. :)
Let me know if you have any sous vide questions!
If you'd like to see more Sous Vide action, check out my Sous Vide 101 post over at The Pioneer Woman!
Home-Brined Corned Beef in Instant Pot
Making your own, home-brined Instant Pot corned beef is a long process, but very little of that time is hands on! It's way easier than you'd think, and the pay off (and corned beef leftovers) are totally worth it!
Ingredients
- 1 cup Kosher salt
- ½ cup coconut sugar
- ¼ cup pickling spices, divided
- 12 whole juniper berries, divided
- 2 cinnamon sticks, divided
- 2 pounds ice cubes (about 6 cups)
- One 3-4 pound beef brisket (grass-fed, if possible)
- ½ large onion, cut into wedges
- 4 cloves of garlic, smashed
- 1 quart beef broth
- 4 large carrots, cut into ½-inch pieces
- 1 small head cabbage, cut into wedges or large pieces
- 2 pounds baby potatoes or other white potatoes cut into 1 ½ - 2 in pieces
- Whole-grain mustard, for serving
Instructions
- Put 2 quarts of water in a large pot over high heat. Add the salt, coconut sugar, half of the pickling spices, half of the juniper berries, and 1 cinnamon stick to the pot. (Reserve the remaining spices for when you're ready to cook the brisket.)
- Let the brine simmer until the sugar is dissolved and then remove it form the heat. dd the ice to the pot to cool the brine quickly. Refrigerate the brine until it is at least 45 degrees F or colder. This might take a few hours.
- When the brine is ready, cut the brisket in half and put it and the cooled brine in a very large pot or container that will be used to hold the submerged brisket (and fit in your fridge) for several days. Add a little water, if needed, to cover the brisket entirely. I found my 6-quart pressure cooker insert pot worked well for this. Chill for at least 5 days and up to 10 days. If it floats to the top, put a sealed aluminum can (like a can of tomatoes) or a glass jar on top of it.
- When you're ready to cook the brisket, prepare your pressure cooker by putting the rack in the bottom. Pull the brisket pieces out of the brine, rinse them off, and put them on a wire rack, laying flat. It's okay to stack them. Add the onion wedges and garlic on top of the beef and pour the beef broth over everything. Add the remaining pickling spices, juniper berries, and cinnamon stick.
- Close the lid and the steam valve and set the cooker to high pressure for 90 minutes. Let the cooker release pressure naturally for 10 minutes before releasing the rest of the pressure manually. Transfer the beef to a serving plate and cover to keep it warm.
- Use a slotted spoon or a spider skimmer to remove the onion, garlic, and large spices from the pot. Add the carrots, cabbage, and potatoes to the pot. Close the lid and the steam valve and set the cooker to high pressure for 4 minutes. Do a quick release when the vegetables are finished cooking.
- Transfer the vegetables to the platter with the corned beef, discarding the cooking liquid.
- Serve with whole grain mustard, if you like.
SOUS VIDE ADAPTATION: When you get to step 4, prepare a large stock pot with water and set your immersion circulator inside. Place the pot somewhere heat-safe because it will get rather warm during cooking. Place the brisket halves in two zip top bags or bags used for vacuum sealing. Divide the broth, onion, and remaining pickling spice between the two bags. Using the circulator, preheat the water to 140 degrees. Add the bags to the water (making sure the food is fully submerged) and cook it for 48 hours. Check on it every 6-8 hours and add more water if it gets low. When the cooking time is up, remove the brisket from the bags and slice. Serve it up, baby. (If you have a Joule circulator, just follow the cooking instructions for the 48-hour corned beef.)
Recommended Products
As an Amazon Associate and member of other affiliate programs, I earn from qualifying purchases.

Corned Beef and Cabbage Recipe Instant Pot Variations
For a quick shortcut you can use the cooking method on a pre-brined corned beef.
You can also swap out the vegetables for other root vegetables that do well in an Instant Pot with liquid. Parsnips, large cuts of sweet potatoes, and beets would work well.
What to Serve With This Corned Beef and Cabbage Instant Pot Recipe
Try making my Instant Pot Mashed Potatoes with some of the reserved bring instead of the chicken stock called for in the recipe.
Roasted Cabbage with Dill Pesto would be delicious with this, too.
Crispy Shaved Brussel Sprouts or Roasted Delicata Squash are also great options.
How to store Instant Pot Corned Beef and Cabbage
Store leftovers in the fridge in an airtight container for up to 4 days.
Leftovers can be served cold or warmed in the microwave.
Corned Beef in the Instant Pot FAQs
Do you cook corned beef fat side up or down?
A general rule when cooking meat is to place the fat side on the top to get the most flavor.
What is the secret to tender corned beef?
Cooking your beef long enough is the secret! If your beef is too tough, simply cook it a little longer.
Should I cut the fat off my corned beef?

This is not necessary, but you can if you want to.