Yep, another homemade gravlax recipe. I loved the Everything Bagel Gravlax so much I decided to take cured salmon in another direction.
This version was especially good in a sushi or poke-style bowl. I'll share the one I made below!

It's super important to use high quality salmon when you're making gravlax. I love Sitka's wild-caught salmon from their subscription boxes.
Sitka Salmon Shares is a Community Supported Fishery (similar to Community Supported Agriculture, if you're familiar) so you always get the freshest seasonal fish from family-owned fisheries.
They ship anywhere in the US, too!
If you go to Sitka's site and use the code PERRYSPLATE you can get $25 off your first box.

Most homemade gravlax is made with a salt-sugar combination which helps "preserve" the fish, making cooking unnecessary.
You can customize it how you like by adding citrus, herbs, spices, and other flavorings.
This time I pulled out the sriracha. I really love a punch of heat in pretty much everything I eat.
(... thanks to the pregnancy of my 3rd child. I never touched hot sauce before that. Wild, right? She's also my "spiciest" child which I find interesting.)

Working with fish can be intimidating for some people, but I can't emphasize enough how easy this is.
It's literally 5 minutes of prep.
And then you wrap it tight and stick it in the fridge for a few days to do its magic.
I use a bread pan to catch the juices and because it doesn't take up a lot of space in my refrigerator.

Also put something heavy on top of it to help compress it.
Traditional Norwegian methods of making homemade cured salmon involved burying it in the ground.
I mean, the idea is the same -- compressing and cooling the salmon as the salt cures it.
Luckily we can just use the refrigerator.

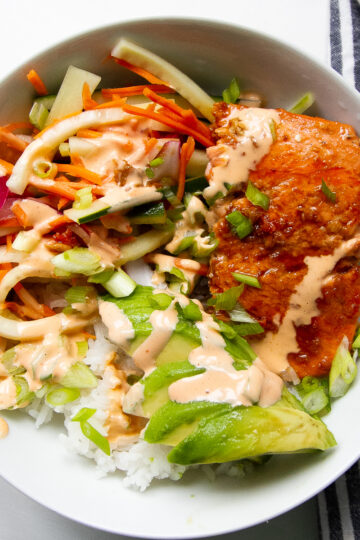
There are a lot of ways to use gravlax, but my favorite way to use this Sriracha Lime Gravlax is in a sushi bowl.
It would be amazing in my Paleo California Roll Sushi Bowl or in place of the tuna in my Ahi Tuna Poke Bowl.
Details for this particular bowl:
- BASE: Roasted Cauliflower Rice and shredded cabbage. You could use steamed jasmine rice, dress the cabbage in lime juice and olive oil, or use any grain you like.
- TOPPINGS: I kept it simple and used the thinly-sliced gravlax rolled into "roses" and added some chopped cocktail cucumbers.
- GARNISHES: My favorite part. This one has sriracha mayo (sriracha + mayo + squirt of lime juice), straight up sriracha drizzled all over, a sprinkle of sesame seeds, and some lime wedges.
I made this bowl real quick for this post and Steve wandered in and ate most of it, saying it was one of the best things he's ever eaten.
He's a sushi bowl man, through and through.
Sriracha Lime Gravlax (Cured Salmon)
That salty cured salmon you love with a sriracha punch. This homemade gravlax is AMAZING on poke and sushi bowl style meals!
Ingredients
- 1 4-6 ounce salmon fillet
- ½ teaspoon fine sea salt or Himalayan pink salt
- 1 Tablespoon sriracha or other Asian-style chili sauce
- 1 Tablespoon fresh lime juice
Instructions
- Place the salmon on top of a large piece of plastic wrap, skin-side down. Pat dry with a paper towel.
- Sprinkle the salt on the fillet. Let it sit for 5 minutes.
- Add the sriracha and lime juice to the fillet, rubbing it in.
- Wrap the fillet up tightly in the plastic wrap and place it in a small dish or pan that can catch any juices that will escape. I like using a bread pan.
- Put something with a little weight on top of the salmon, like a can of tomatoes.
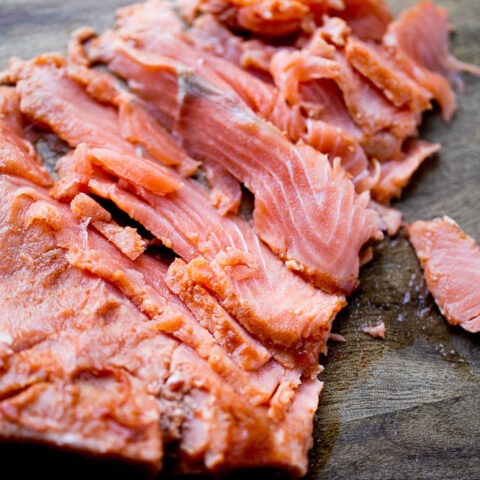
- Chill for 3-5 days. Begin checking on day 3. The salmon should be more firm than it was on day 1 and slice easily. The longer it sits in the fridge, the stronger the flavors will be.
- Slice very thinly and serve how you like! We love making sushi bowls, avocado toast, and adding it to some hardcooked eggs or on salads.